Topic: Made my own bamboo arrows for the first time....
Bamboo arrows, are just beautiful and look and feel amazing in the hand. I haven't had a chance to shoot them yet, and Im dying to do so.
I just made my first batch of bamboo arrows, not from scratch but I got pre-spined and finished shafts on eBay, and added glue on field tips (125gr 11/32 size) and nocks (11/32), and used my bitzenburger right hand helical jig to fletch 5" feathers. I bought some tips and nocks 5/16 but they didn't fit. 11/32 is the right size for these it seems.
Items needed:
1. Bamboo shafts full length(33") spined at 70-75, since my bows are around 45-50lb draw, the Korean bows require higher spine than actual the sellers say. I bought shafts from 3 different sellers and they all look very similar except slight differences in color.
2. Arrow sharpener, (11/32 size), the one I have is used for wood arrows and worked perfect for me. One end makes a slightly longer taper that is the tip and the other side will make the shorter taper for the nock.
3. Glue on field tips 11/32 size and 125gr ( I favor the 125 for these bows)
4. Marco or snap on glue on nocks 11/32 size in black, or any color you choose.
5. True flight or gateway 5" barred feathers
6. Arrow insert hot glue
7. Wood cutting board or block to push down points, and stove to heat glue.
8. Serving thread or nylon thread for binding if wanted.
It was straight forward, and not hard at all. The hard part was getting the right size accessories which are outlined above. 11/32 fits all the shafts I have tried it in so far while 5/16 for the most part didn't.
Determine which end is thicker and heavier, this is easy to see.
That will be your point end. Use the arrow end sharpener to sharpen the tip.
Heat hot glue and put on arrow tip, put glue on field point on top, twist on, and use wood block to hold the point as you push down the shaft, push hard, you don't want it coming out. I then reheat the field tip over the stove again briefly, and push down again, it goes in even further.
Let cool and peel away any and all glue on tip. You don't need a lot just enough to fill the tip. Some of them had a small hole where the bamboo is hollow, I filled it with as much hot glue as I could. Some guys recommend a wooden dowel, which I did buy but didn't use as I think it is tough as it is.
Sharpen the nock end with shorter end of the sharpener. Heat glue, put on nock end filling the hollow if any on the nock end. Put nock end over stove for a second or two and then put the plastic nock on, don't press too hard or the heat and pressure will break or bend the nocks.
Clean off excess.
Let cool down.
Fletch arrow feathers leaving 1/2 or 3/8 inch from end of feather to beginning of nock. I use fletch tape as its much better for feathers and clean. After all feathers fletched, use drop of fletch glue on the ends of the feathers to keep them secure. Let dry. That's it!


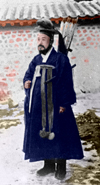
Hope you guys can post some pics and make your own! I know they aren't the "real" Korean arrows that cost $20-$50 each!!! Mine cost a fraction of that!!
But I hope they can fly and look good for being handmade by me. Maybe one day when I have the time I will make some from scratch but it is a huge process if you have seen Thomas's Korean bamboo arrow making video which inspired me to make my own. It was so much fun making them. I have yet to weigh them or shoot them, the ones I did weigh were all different weights, ranging from 420gr-530gr, all over the place. I will see how they shoot and hold up and report back.